Its been a kind of on-off month in the workshop with it being summer. Although looking at the photos below its been a reasonably productive August.
We’re still working our way through the last few pieces for a client we’ve been working with for the last year. Now focused on his kitchen the guys I share the workshop with needed to build a large bench and table. The bench was in the style of a church pew with an oak frame that continued the theme that we’ve had throughout with quilted walnut panels added for contrast. For the frame I collaborated with one of the guys who is an old school woodworker and made up a few of the pieces of curved joinery for him. I think he was suspicious to start with of whether I’d be any use but it worked out well. The parts he made by hand were spot-on to the pieces I cut on the CNC. In the first three photos below you can see some of the pieces of the frame I cut and them being assembled. The fourth photo shows some of the large walnut panels being quilted with a point-roundover tool on the CNC and then the rest of this group of photos show the finished bench, a door frame we made for the same room and also a chest that will also go in the kitchen. This design combination looks really good and matched well with the brass screens in the kitchen doors that you’ll see further down the page.


The table for this customer was an interesting design with a stepped base. I cut a set of MDF panels from Tom’s design that they could use on the router and spindle moulder to make the 20 levels that make up the base. You can see these in the first photo below, in the second photo you can see the finished table which looked great. Unfortunately the customer decided he did not want the stepped look and that he wanted it smoothed out, doh. So in the third picture you can see the corners being hand-ground off. As of typing this is still a work in progress - we’ll also be cutting a kind of valley shape in the top of the table and filling it with epoxy. More of that next month…


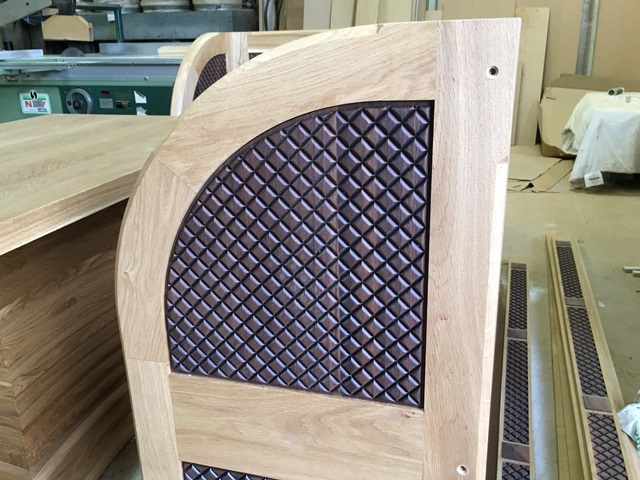
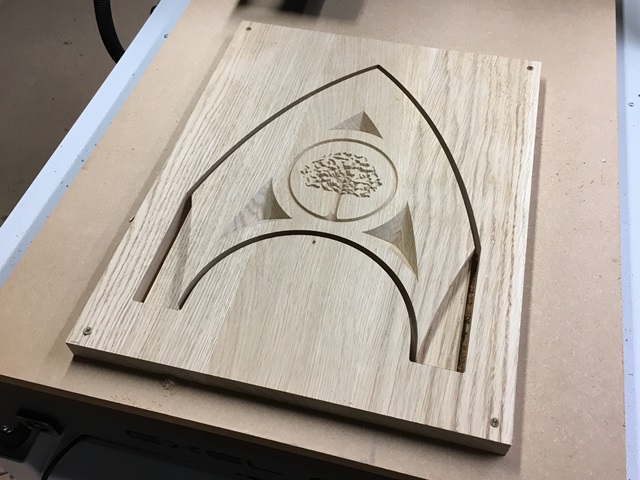
Below are a few other pieces from the same kitchen. The arched frame will tuck into an alcove with the chest from the first section of photos at its base. On these it was nice to cut both the decoration, shape and also some half-lap joints for accurate assembly. The second set of three photos show the final finished version of the kitchen cabinet doors that have been a work in progress for months - here you can see the antiqued brass mesh in the background, this matches the quilted walnut panels really well. In the last photo you can also see the walnut trefoil added at the top of the lower arch part. These are really very beautiful now and have got to be some of the most ornate kitchen cabinet doors in existence…


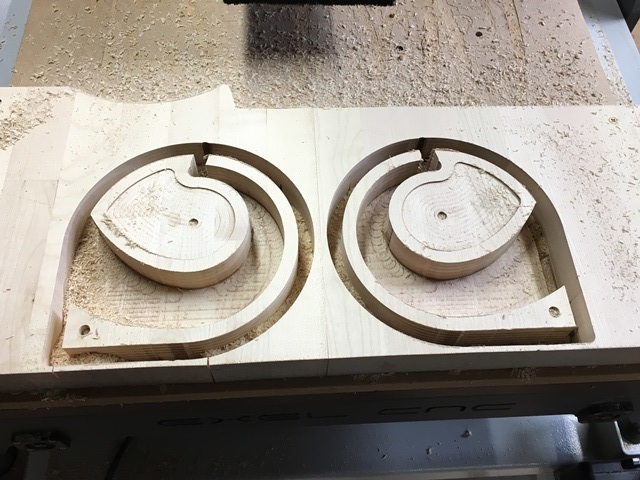
It was initially planned to order metal handles for the doors above that would have a pyramid texture. These proved to be extremely expensive though, so I was asked if I might be able to make something similar in walnut. This was an interesting challenge as the texture is on 3 sides of a square cross-section. After a bit of playing around I decided to carve the sides of the handles with standard 2-sided machining then use the “legs” to position it for machining the top side. This last step required me to carve rectangles into a sheet of MDF on the table and inserting them, then zeroing of the top face and machining the third set of pyramids. In the first three photos below you can see each side being machined in the same order they were cut in. Once I’d perfected the prototype (this took three goes with customer input on design). It was time to start production - the final two photos show a set of nine handles being machined from one side and then the tops being cut. I have some longer versions to make next week to create the complete set. I was very happy with how these turned out. They’ll need to have threaded sleeves glued into the legs for installation, plus a reasonable amount of sanding still to go…


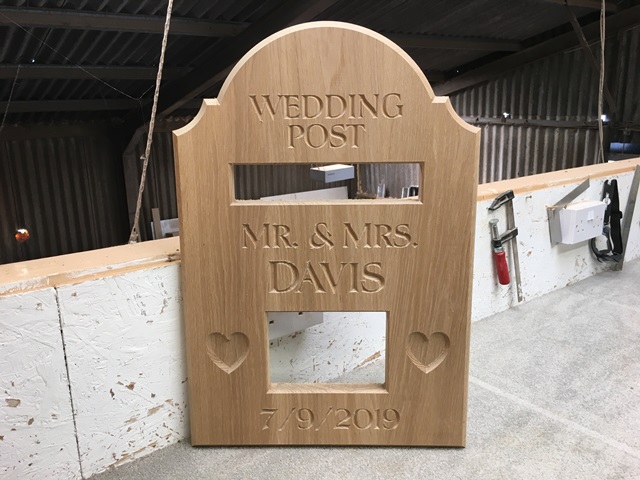
Finally, I had a couple of personal projects this month, in the first photo you can see a wedding post-box front I made for one of the guys in the workshop. Working to their design this was pretty straightforward v-carve and cutouts. The second and third images show a passive amplifier I made for my phone - this is a prototype but worked very well. I’ll tweak the design a little though and aim to make a finished version soon.